New Static Contact Us Form Version 2.1 Widget for Blogger
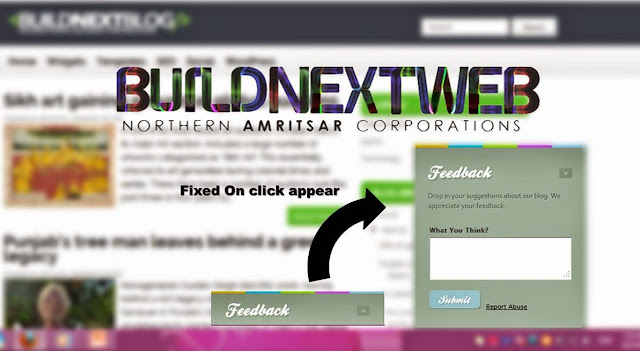
 Hey once again, we have came up with the latest feedback or contact us widget for blogger users with very efficient settings. The widget is very powerful for getting vey quick feedbacks without filling much info by the feed backers. The original source of this tutorial was from Tutorialzine, we made some modification, changed the form method and made it work smoothly for blogger. So lets get started. But BuildNextWeb team has modifier it for blogger.
Please Note that this widget takes a little more time to load depending upon your network connection speed.
Demo


At final step:-Thats it. Now name the theme and save it. After saving the form, click on code of the form from the forum manager page and select Embed form code and copy the javascript from there.
Thats all, now check your blog and hope it works. If you have Any problem regarding this widget let us know in comments.
Thank you.
Lets See how to Install this Widget in blogger.
1: Open Blogger Dashboard and move to Edit HTML.
2: Now search for
]]></b:skin> and paste the below code before ]]></b:skin> #feedback{ background-color:#9db09f; width:310px; height:330px; position:fixed; bottom:0; right:120px; margin-bottom:-270px; z-index:10000; } #feedback .section{ background:url('https://blogger.googleusercontent.com/img/b/R29vZ2xl/AVvXsEg3mBpH-Msad3iaA9jM_IlsmjuTLJtHuZlxwF4x3GxQRyHOixaJcNnx4vWNz5PRmzbkQRaJEwVe4vhHEaKncyhr_Jix292gqMpBQ3KdpYqHdW9M-9jiLRCfQSu2bgr2ttlQBpvzApM6noET/s1600/bg.png') repeat-x top left; border:1px solid #808f81; border-bottom:none; padding:10px 25px 25px; } #feedback .color{ float:left; height:4px; width:20%; overflow:hidden; } #feedback .color-1{ background-color:#d3b112;} #feedback .color-2{ background-color:#12b6d3;} #feedback .color-3{ background-color:#8fd317;} #feedback .color-4{ background-color:#ca57df;} #feedback .color-5{ background-color:#8ecbe7;} #feedback h6{ background:url("https://blogger.googleusercontent.com/img/b/R29vZ2xl/AVvXsEimM1h2BfF8rmYjTrGh-045ManJy96e1sd-qbBxxupnACNOhNmDtmvGw2mG_yyfDjLj1p-2mAKe76dBof5FyA0yKKKZIqbKmDkDwmw8NKlzVDTYm30mPCHPOFEZ_y44PfMgN2qYxJZMbOER/s1600/feedback.png") no-repeat; height:38px; margin:5px 0 12px; text-indent:-99999px; cursor:pointer; } #feedback .message{ font-family:Corbel,Arial,sans-serif; color:#5a665b; text-shadow:1px 1px 0 #b3c2b5; margin-bottom:20px; } #feedback .arrow{ background:url('https://blogger.googleusercontent.com/img/b/R29vZ2xl/AVvXsEhUBaJYeYy276cflRwEh7KFRkMhVjXWTUL_fW3L4AlvdSeUVNARf59TyzKaPccaSP1O605hjzrdHuSNu2DGTCcrOpiOiZ21ngv6Whob_3TTuKll-4U8_Mob_42u0P49QBQhGq93GNRYbiz7/s1600/arrows.png') no-repeat; float:right; width:23px; height:18px; position:relative; top:10px; } #feedback .arrow.down{ background-position:left top;} #feedback h6:hover .down{ background-position:left bottom;} #feedback .arrow.up{ background-position:right top;} #feedback h6:hover .up{ background-position:right bottom;}
3: Search for
Sidebar Section or Main-wrppaer and place the below before that code<div id='feedback'> <!-- Five color spans, floated to the left of each other --> <span class='color color-1'/> <span class='color color-2'/> <span class='color color-3'/> <span class='color color-4'/> <span class='color color-5'/> <div class='section'> <!-- The arrow span is floated to the right --> <h6><span class='arrow up'/>Feedback</h6> <p class='message'>Drop in your suggestions about our blog. We appreciate your feedback.</p> WUFOO FORM SCRIPT GOES HERE </div> </div>
4. In order to ensure the smoothness when its clicked, we are adding a
little script. If jQuery is initialized previously initialized in your
blog template, add only the second script after <head> <script src='http://ajax.googleapis.com/ajax/libs/jquery/1.4.2/jquery.min.js'/> <script src='http://sites.google.com/site/bloggermint/script.js'/>
IMPORTANT STEPS STARTS
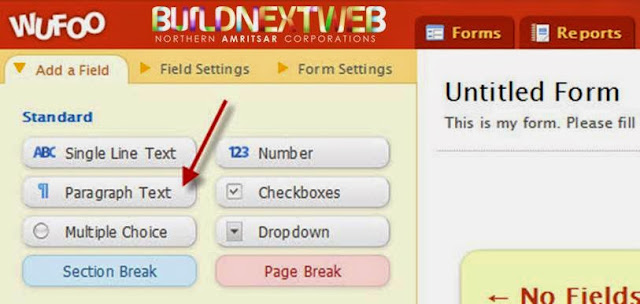
5.This is the very important step. In order to add a form to the feedback form, I am using Wufoo forms to be integrated in the feedback form. So visit Wufoo website, create a free account. After creating the account, you will be taken to the form creator dashboard, now select paragraph text to insert it in the form.

7. Once you added the paragraph text, click save and select I’m finished! Take me back to the form manager.
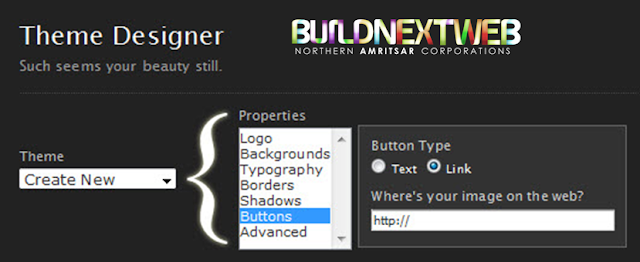
8: Now you will be in Forum Manager, so click on Default theme drop down box and select New Theme. In the Theme Designer you have to do certain things.

1. Go to Backgrounds > All sections except Field and change the color to transparent
2. Go to Buttons and select the button type as link and enter this link there
2. Go to Buttons and select the button type as link and enter this link there
https://blogger.googleusercontent.com/img/b/R29vZ2xl/AVvXsEjjIen3j6XOuigW2YwJ7FaCAXie4hMRH1RDlUP63NSPjbPzoDCKU51yIV9RVcl9JE2YJ6iibTlwO_NckQQeeFHqmH7_G-iI5V_kJaGcBsFaVvsQmkqOrVgMocX5FwRnXmnzVaKHRYfynexC/s1600/submit.png3. Go to Advanced and paste this URL on the text box –
http://sites.google.com/site/bloggermint/feedback.css
At final step:-Thats it. Now name the theme and save it. After saving the form, click on code of the form from the forum manager page and select Embed form code and copy the javascript from there.
Thats all, now check your blog and hope it works. If you have Any problem regarding this widget let us know in comments.
Thank you.
ABOUT THE AUTHOR
Hello We are OddThemes, Our name came from the fact that we are UNIQUE. We specialize in designing premium looking fully customizable highly responsive blogger templates. We at OddThemes do carry a philosophy that: Nothing Is Impossible
0 comments:
Post a Comment